It’s a Yummy tie!
The people have spoken. What’s Italian for Yummy?, my latest release, could comfortably have its own accompanying recipe book. But in lieu of that big-publisher money, I asked my readers which of Summer’s spectacular dishes they wanted to make.
It was a choice between…
- Fig and Cardamom good-neighbor scones
- Creamy Maritozzi (bumping) buns
- Going down on her Dumplings
- Cinn-fully tarty blueberry and almond tartlets
- Ginger kisses with (clementine) tongue
- Boozy lemon meringue misunderstood apology pie
And the winner is… a three way!
Calm down. This isn’t that kind of book. Fortunately, the second question in my survey narrowed it down to the 2 recipes most urgently required. So, call this a Valentines Day present from me: mains AND dessert. What’s more, the book will be on special for this week only. Guaranteed romance for Valentines day. Because life is unpredictable enough.
On with the recipes! One savory, one sweet. First, the meal Summer and Finn make together. it’s a cooking lesson, which is shamelessly foreplay from beginning to end. Food and sex. What can I say? It’s a sensual read.
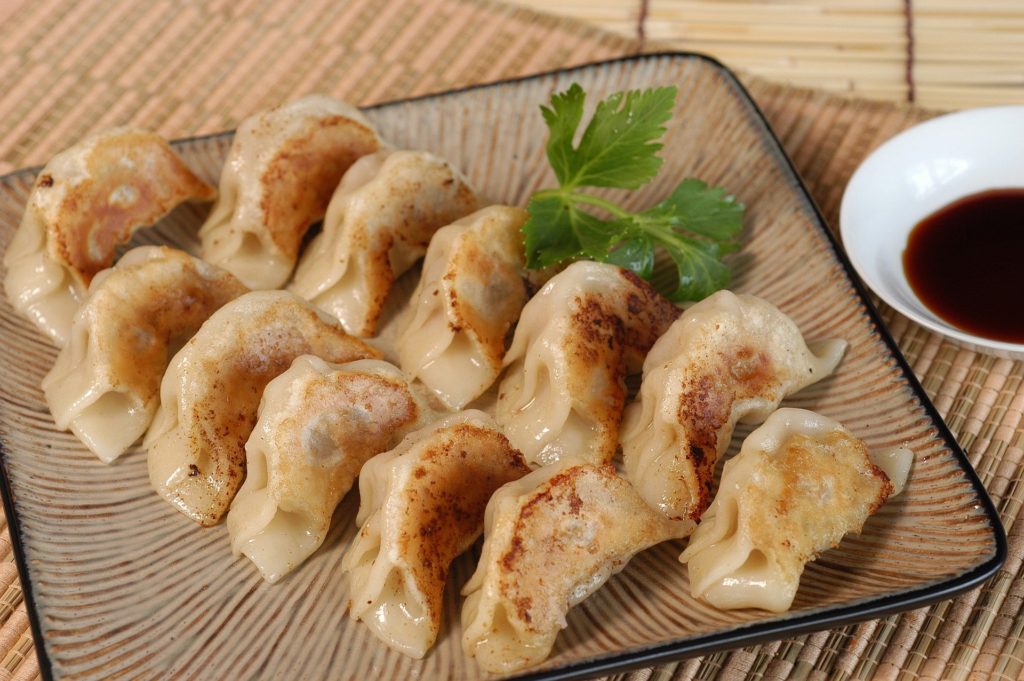
Going down on her Dumplings
You will need:
- salt, 2 1/2 cups of flour and 2/3 cup hot water for the wrappers
- 2 cloves minced garlic
- 1 diced onion
- 1 tbsp minced/grated ginger (less if you use dry powder)
- 1 finely grated carrot
- 10(ish) medium sized button mushrooms (or equivalent amount) – finely chopped
- about 250 grams of your choice of green vegetables, eg. cabbage, spinach, leek, spring onion, silver beet/chard, coriander… you choose your leafy herbs to suit. Mix a couple of greens together – one mild flavor, one stronger is good. Chop it all up nice and fine.
- 2 Tablespoons soy sauce
- 1 Tablespoon rice vinegar
- salt and pepper to taste
- 1 tsp sriracha (optional… but then it’s all optional really!)
- boiling water or stock
First, the wrappers. Mix the flour and 1/2 a teaspoon of salt in a bowl. Add the hot (not boiling, just warm really) water until combined. Knead this (in the bowl or on a floured surface) for a few minutes until it’s smooth and soft. Put the ball in cling film and refrigerate for 30 mins (or however long it takes to prep the filling… it’ll be fine).
The makings:
For less stress, chop, grate and smoosh all the veggies before you start. First up we need, your onions, mushrooms and carrots. Fry these in a bit of oil until browning. Add the green veggies next, a bit of salt, and keep frying. Stir occasionally so that they cook evenly. A little water will help steam and soften and wilt it all into a nice mixture.
Add the garlic, ginger, soy sauce, vinegar, salt and pepper, sriracha. Or whatever else you fancy really! But avoid overdoing it with too many flavors: if you add something, take something else out, eg. remove the garlic and add shallots. If you don’t have rice vinegar or rice wine, use the vinegar you have. Anything in this recipe can probably be swapped out for the nearest thing in your kitchen. Experiment!
If you’re doing a meat version, you don’t cook the meat first. You fry the onion, garlic, spices, etc. and any other veggies you want, then you mix the raw pork or chopped prawns or shredded chicken into the cooked vegetable mix. If you want quantities, there are loads of great recipes online. Google away…
Set aside your filling mix to cool.
Now we roll out the wrappers: Divvy up the dough into 2-3 smaller balls. Flour your work surface and your hands then roll one ball of dough back and forth to make a long sausage. Make dirty jokes. Laugh about this. Enjoy the simple pleasures in life. Low brow humor is a great way to bond with your children/spouse/flatmate/neighbor/unwitting victim/friend.
Use a butter knife to cut off segments of the dough sausage (giggling ensues), each about a tablespoon of dough. If you have a cooking buddy or two, form yourselves a wee production line:
- roll the dough ball in your hands to form a sphere
- smoosh it flat with your palm on your floured work surface
- flatten it out to about 1mm thick using a rolling pin/empty beer bottle/water glass (floor this too!)
- put a teaspoon of filling smack-dab in the middle
- the fun foldy bit – more detail below
Folding dumplings is a bit of an creative endeavour along the lines of cappuccino art. You can make a fancy peacock feather design and wow your friends, but let’s be honest, it’s the creamy perfection of that milky foam that counts. With dumplings, as long as they cook properly and taste good, it’s not worth losing sleep over the exact folds. Key thing: the filling should be sealed inside the wrapper.
This is what I do: fold the circle in half and pinch together the mid-point, half way along the semi-circle curve. Then move your thumb and forefinger slightly to the right and pinch again, smooshing it toward the middle. Do that again and again till you get to the corner. Then turn it around, start at the middle, and go the other way.
If you’re feeling artistic and this isn’t challenging enough yet, have fun with this video. Number 5 is closest to what I do (bottom left of this thumbnail:)
A couple of warnings, before we get to the cooking. Don’t pile up your folded dumplings. They will stick. They’re not called potstickers for nothing. They are sticky af. Spread them out on baking paper or (if you have an awesome kitchen) your enormous floured countertop. Try not to touch the folded dumplings until you cook them.
Now, the frying. You can steam them or boil or even deep fry, but pan-fried is best, and it’s what they do in the book, so here we go.
If you have a cast iron pan, use it. If not, go for your heaviest flat-bottom fry pan. You’ll also need a good flipper – metal is best. You want something that can really get under these sticky bastards.
Heat the pan to medium high and make sure oil covers the base. Arrange the dumplings in a circle around the outside like a Christmas wreath, and then fill the middle. It’s okay if they touch each other, even lean on each other. You kind of want them all standing up, with folded edges at the top. You’ll have an easier time unsticking them if they’re touching the base of your pan as little as possible.
Fill the pan with dumplings – yes, it will probably spit at you a bit while you’re arranging them in the hot oil. A little pain is a reasonable price to pay for the pure bliss to come.
Give them a minute or two to brown on the bottom. In this time you’ll want to boil your water or make up your stock. You can steam them in just water but stock adds a little something-something.
Have your pan lid ready. Or an oven tray. Anything to trap the steam in the pan. Once the dumplings are brown on the bottom, pour ~1/3 cup of water into the pan and immediately put the lid on. If your steam is escaping (sometimes it can’t be avoided) you may need to add a little more water in a few minutes.
Cooking time varies now, depending on your heat source (gas/electric) and filling (meat needs a good 15 minutes, but vegetarian dumplings can be done in half that time). Keep an eye on them and when the water is all gone (absorbed into the dumplings for the most part), it’s almost time to remove them from the pan.
You’ll need that good flipper now. Edge it under one side of the circle of dumplings. Expect to maybe tear the first one but try to get right under. Once the first is lifted, the others seem to come away easier, in my experience. With a cast iron pan and metal flipper you can really go to town and scrape them away. If you have a Teflon or other “non-stick” situation… good luck! You might need it. The good news is, they taste just as good torn to bits.
Turn them onto a plate, brown-side up (for the aesthetic and no other reason), and reload your pan before you eat – or else you’ll burn your mouth. You were warned. I take no responsibility.
Give the pan a wee scrape-clean then re-oil and go again until they’re all cooked. Serving suggestions: simple light soy sauce, a bit of lazy sacrilege sweet chili sauce (my fave naturally), or go legit with dumpling dipping sauces.
Final warnings: suggestive and socially-inappropriate moaning is a likely reaction to the consumpution of these babies. If this happens to you, you’re welcome. Share this recipe and tell your friends about What’s Italian for Yummy?
Now, if you’ve any room left, it must be pudding time. Summer gives bite-size versions of these to Finn as a sort of peace-offering when things are getting complicated and everything’s kind of falling apart. Her apology pie backfires, and it’s a whole thing, but at least the pie tastes like a dream.
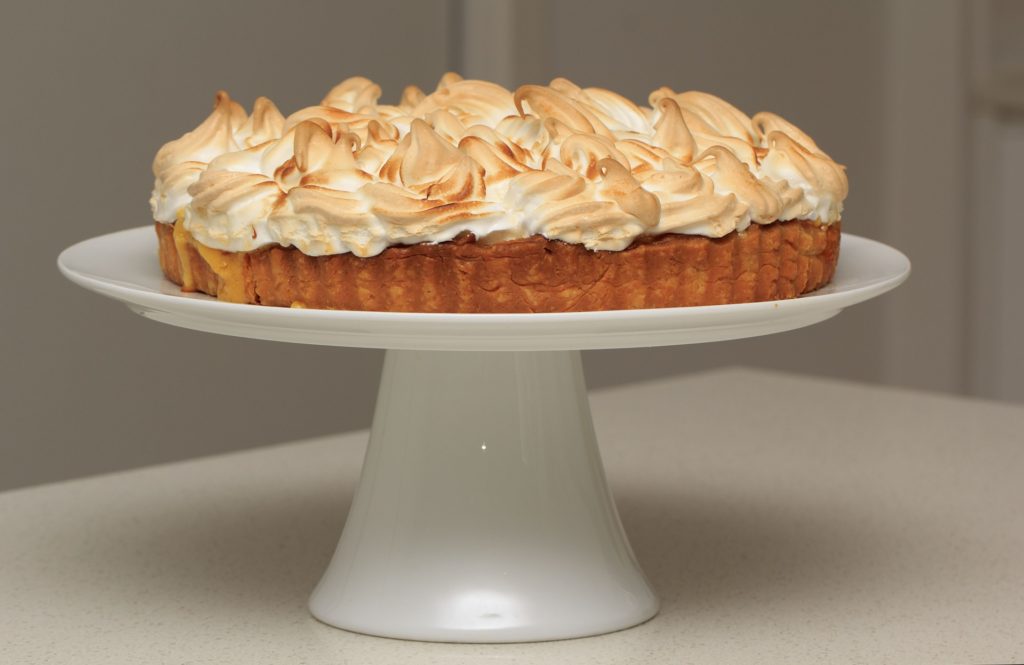
Boozy lemon meringue misunderstood apology pie
You’ve got a couple of options with this one. The easy way, or the hard way. The easy way involves buying some basic sweet short pastry. The hard way involves making short pastry. Feel free to make it even easier by buying yourself some lemon curd and then combining it with the limoncello.
No judgement, you go right ahead and google short sweet pastry. That’s fine. You are the superior domestic deity.
For the rest of us plebs, we need:
- 320g short crust pastry
- 3 Tablespoons of cornflour (NOT cornmeal)
- 300g caster sugar
- 2 lemons – zested and juiced
- 1 orange
- 4 eggs – separate yolks and whites
- 80g butter
- 75ml limoncello liqueur
The makings:
Line your pie dish with the short pastry, trim the edges and refrigerate for 10 mins or so, then blind bake (either fill with baking paper and ceramic beads or pop a smaller tin on top to keep the pastry from puffing up like a balloon). You’ll need this to bake for 20 minutes covered, then remove the beads/tin/paper and give it another 15 minutes to get all golden.
During all the waiting time, you can make the filling. Put the cornflour, 100 grams of caster sugar, and all the lemon zest into a sauce pan.
Juice your orange and add water so that you have around 2/3 Cup. Add this and your lemon juice to the pan. Stir constantly and cook (medium heat) until thick like syrup.
Remove from the heat. Give it a minute to cool a little – now’s a good time to separate those damn eggs, measure out your booze, and chop the butter into cubes. Beat your egg yolks into the hot mixture, then add the butter and booze. Mix till smooth and put aside.
Hopefully your base is all done. Take it out and turn the oven to grill.
Whisk the egg whites into a peaky frenzy. Slowly add the other 200 grams of caster sugar. They’ll go lovely and silky, and you’ll get a bit of a work out – if nothing else, it’s a great way to vent all that tension.
Pour the lemon mixture into the pastry base. Spread the meringue over the top (or pipe it all pretty you’re feeling posh), getting it right to the edges, then give it a little swirl.
Pop the whole thing back in the oven, under the grill, for 5-10 minutes. Long enough to golden-up the top of the meringue. WARNING: this will burn if you’re not careful. Keep an eye or turn the temperature down. You can have the pie lower in the oven, too.
Credit for these recipes where credit is due – I first used this dumpling recipe and adapted the boozy lemon meringue pie from here. I hope you enjoy one or both sometime soon. Buon appetito!